Rules for installing infrared heaters

If you plan to purchase an infrared heater for an apartment, private home or office, you should study not only the technical characteristics of the device, but also find out how the installation of an infrared ceiling heater (or wall) is carried out in order to correlate the information and installation rules with the initial conditions.
Installation of IR heaters: general rules
Experts who have been installing the infrared heater on the ceiling and walls for more than a year, are advised to strictly follow several rules before proceeding with the installation of the device:
- Buy heaters in specialized stores: this is a simple recommendation, but for some reason many consumers ignore it and make a purchase “on hand” or on online platforms that do not provide a minimum package of documents. When buying IR devices in company stores, you will not only check its operation, you will receive valuable recommendations from managers and a warranty card.
- Learn how to install infrared ceiling heaters: what tools you need to use, and what improvised materials must be at hand - a screwdriver, a hammer, a punch, a spare set of screws, metal hooks.
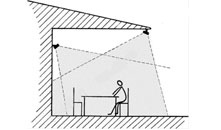
- Choose the location of the device - wall or ceiling. The place must be selected wisely so that the flow of warm air is evenly distributed over the entire area of the room for several minutes. In this case, the key aspect is the installation height of the infrared heater: the higher you fix the device, the greater the area it can cover.
- Check the condition of the climate technology.
Installing an IR heater: step by step instructions
Installing an infrared heater on a wall or ceiling takes place in three stages:
- fixture mounting;
- electrical connection;
- check.
At the first stage, you need to prepare the tools: a screwdriver, pliers, a screwdriver, tape measure. In the chosen place for the grooves located on the back of the device, you need to hang it from the ceiling or fix it to the wall. To fix in a horizontal position you will need metal hooks, but installing an infrared heater on the wall will be more reliable if you use screws, and then place the equipment on them.
At the second stage - connection to the power supply, it is worth using terminal blocks. With their help, installing an infrared heater on the ceiling or wall will be faster. All you need is to connect the terminal (ground) according to the scheme and the two remaining ones - phase and zero to the corresponding electric cables.
At the final stage of work, check the operation of the device, and make sure that it works flawlessly. Installing an infrared heater with a temperature controller is carried out in a similar way.
Why you should buy an infrared heater?
Installation of IR devices is a profitable and practical purchase: you get a compact device with which you can create a comfortable microclimate at any time of the year. Moreover, the cost of installation and maintenance of equipment will be minimal. You don’t have to change components often, because they are made of reliable and practical materials, and it needs several times less energy to support its operation than for the operation of gas burners or electric convectors.
Another advantage of these devices is a quick payback. You will fully recover costs within 3-4 months, significantly reducing the cost of paying utility bills.
Create a warm and comfortable atmosphere in your home with infrared heaters!
